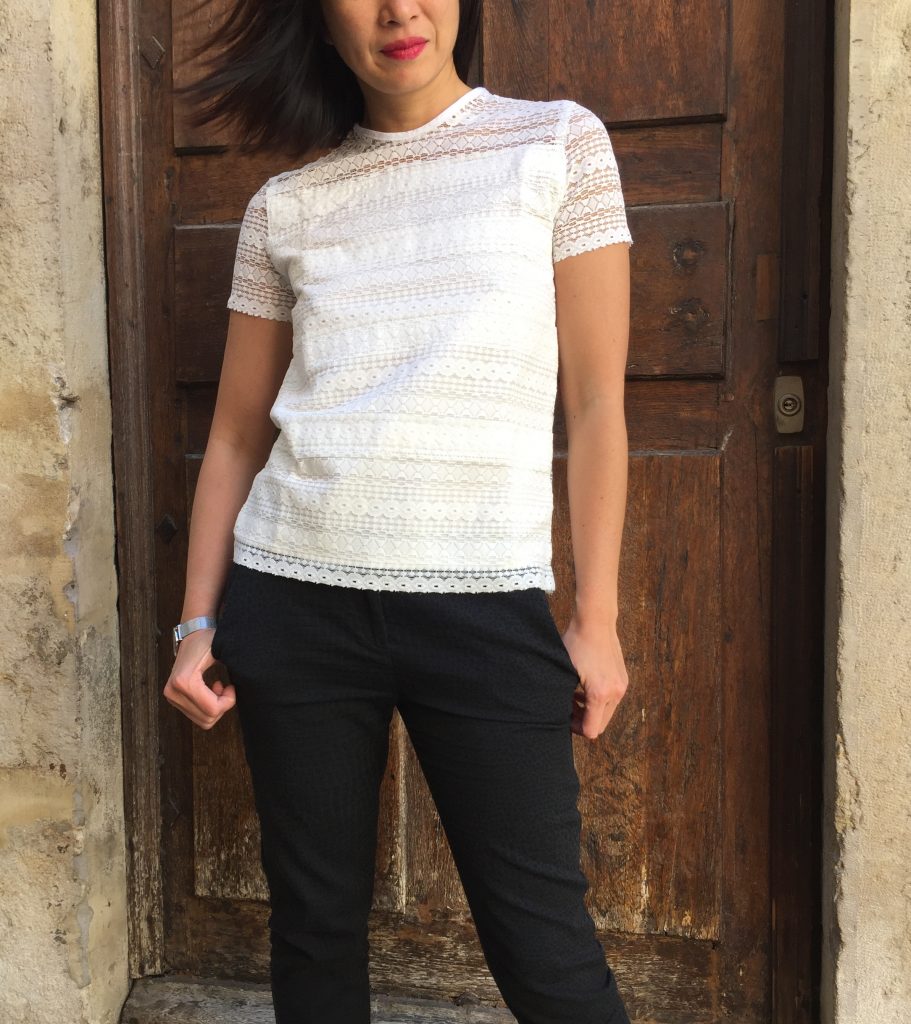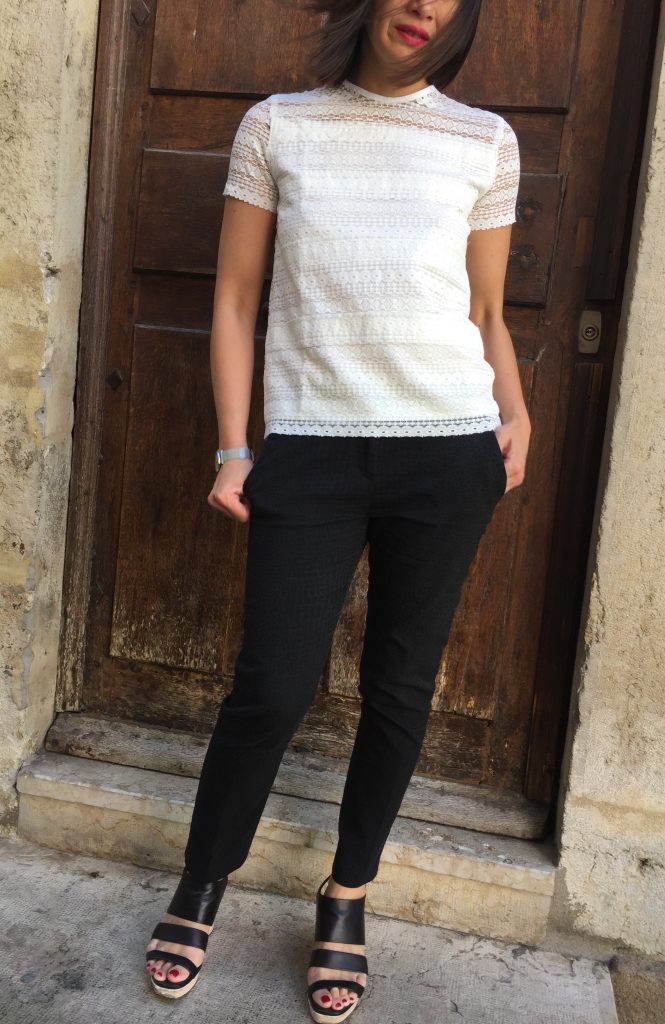
Apres la Robe Aurore chic chic, j’avais envie de partager un modèle épuré et vous montrer que la Dentelle peut donner une toute autre allure à une coupe “basic” ;)) En effet la Dentelle rayure by Printstand délivre inévitablement le côté chic 😉
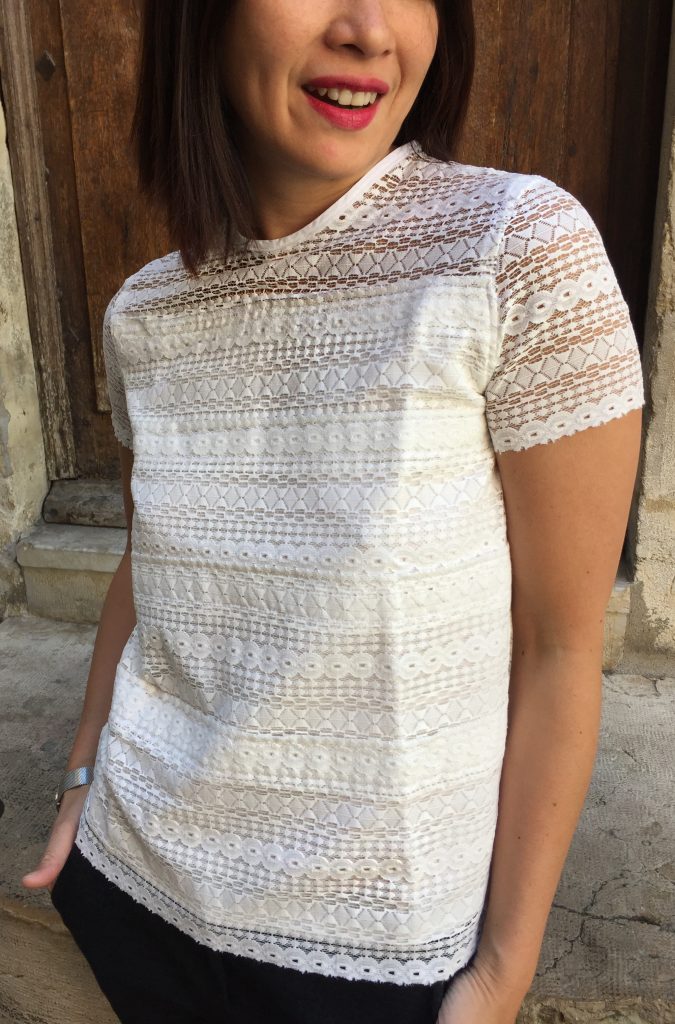
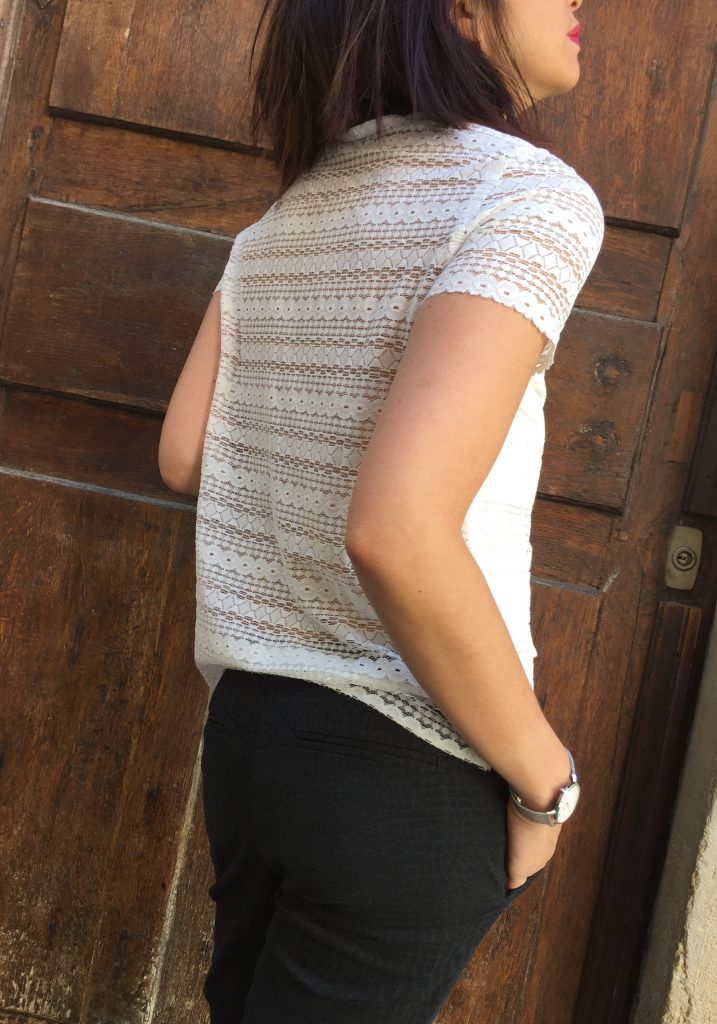
Ainsi une fois la Dentelle rayure by Printstand entre les mains le Top Laurie striped by Named m’est apparu comme une évidence. En effet son détail différenciant se distingue par ses plis superposés qui permet de jouer sur la transparence de la Dentelle ;))) Suggérer est le comble de l’élégance, c’est pourquoi le devant sera orné de plis et doublé et votre dos totalement suggéré ;)) Tout comme la Robe Aurore, j’ai utilisé les bordures de la dentelle sur les extrémités, soit les bords de manche et le bas pour valoriser pleinement cette superbe Dentelle rayure by Printstand
C’est un modèle accessible et rapide à décliner ;)))
Niveau : Débutant – Temps de réalisation : 2h – Coût : €€

En préambule, il est important de bien poser les pièces de façon à bénéficier des belles bordures pour les manches et bas du devant et dos. Aussi j’ai pris au moment de la découpe de bien aligner les rayures des manches au haut pour une continuité optimale. Le Top Laurie striped by Named nécessite peu de métrage soit 1,10 m pour un T36 et 1,45m pour T44, aussi si vous doublez le devant vous aurez besoin de 50 cm de satin coton. A noter que j’ai souhaité garder le haut du devant sans doublure pour faire ressortir le motif de la Dentelle rayure by Printstand et doubler au dessus de la poitrine par pudeur ;))))

Le Top Laurie striped by Named se monte à l’identique d’un tee shirt, l’étape clé résidera dans la réalisation des plis. Aussi il vous suffira simplement de bien suivre les repères de chaque côté du devant de façon à ce qu’ils soient bien alignés. Pour ma part, j’ai choisi de rajouter un pli supplémentaire corrélé aux rayures initiales de la Dentelle rayure by Printstand. Une fois cette étape passée, il vous suffira de poser la doublure satin coton préalablement coupée au niveau du haut de la poitrine ce qui fait que vous aurez une partie de l’emmanchure sur le satin coton.
Puis vous monterez successivement le devant au dos à travers les épaules, puis les manches. Pour le col, j’ai cousu un biais coton ton sur ton ce qui a le mérite de bien maintenir le col car la dentelle est un tissu fin et très souple. Si vous avez bien coupé avec les bordures dentelle d’origine, vous n’aurez pas besoin de faire d’ourlet ou sinon vous aurez toujours la possibilité de faire un ourlet roulotté ou point zig zag.

En conclusion, cette version du Top Laurie striped by Named illustre pleinement le pouvoir de la Dentelle rayure by Printstand …Faire d’un “basic” une pièce chic à moindre coût et d’une simplicité redoutable ;))))))))) C’est un modèle que vous pourrez aussi décliner en jersey très fin pour jouer sur la transparence avec les plis superposés ;))
Patron : Top Laurie striped by Named (7€ en pdf)
Tissu : T36 – Dentelle rayure by Printstand (1,10m x Laize 1,40) – 16€/m – Satin coton (50cm x Laize 1,40m)
[accordion]
[item title=”English version”]
After the chic Aurore Robe, I wanted to share a refined model and show you that the Lace can give a very different look to a “basic” cut:) Indeed the Lace Stripe by Printstand inevitably delivers the chic side; )
So once the Lace Stripe by Printstand in the hands the Top Laurie striped by Named appeared to me as obvious. Indeed its differentiating detail is distinguished by its superimposed folds which allows to play on the transparency of the Lace;)) Suggest is the height of elegance, that is why the front will be adorned with folds and lined and your back totally Suggested);) Like the Robe Aurore, I used the edges of the lace on the ends, the edges of the sleeve and the bottom to fully exploit this beautiful Lace Stripe by Printstand
It is an accessible and fast model to decline;)))
Level: Beginner – Completion time: 2h – Cost: €
As a preamble, it is important to lay the pieces in such a way as to benefit from the beautiful borders for the sleeves and bottom of the front and back. Also I took at the time of the cut to properly align the stripes of the sleeves at the top for an optimal continuity. The Top Laurie striped by Named requires little footage either 1.10 m for a T36 and 1.45m for T44, so if you double the front you will need 50 cm of cotton satin. Note that I wished to keep the top of the front without lining to bring out the pattern of the Lace Stripe by Printstand and to double over the chest by modesty;
The Top Laurie striped by Named is the same as a t-shirt, the key step will be the realization of the folds. So you simply have to follow the markings on each side of the front so that they are properly aligned. For my part, I chose to add an extra fold correlated with the initial stripes of the Lace Stripe by Printstand. Once this step has passed, you will have to put the satin cotton lining previously cut at the level of the top of the chest so that you will have a part of the armhole on the satin cotton.
Then you climb successively the front to the back through the shoulders, then the sleeves. For the collar, I sewed a bias cotton tone on tone which has the merit of maintaining the collar because the lace is a fine and very supple fabric. If you have cut it with the original lace trim, you will not need to make a hem or else you will still be able to make a hem or zig zag.
In conclusion, this version of the Top Laurie striped by Named fully illustrates the power of the Lace Stripe by Printstand … Make a “basic” a chic model at least cost and a formidable simplicity;)))))) ))) It is a model that you can also decline in very fine jersey to play on the transparency with the folds superimposed;))
Pattern: Top Laurie striped by Named (7 € in pdf)
Cloth: T36 – Lace Stripe by Printstand (1.10m x Width 1.40) – 16 € / m – Satin Cotton (50cm x Width 1.40m)
[/item]
[/accordion]

 Votre panier est vide.
Très joli ! Ça donne encore plein d’idées. ..! Merci; -)